10.31.2011

Boo who?


Oh, boo who! Today is Halloween, a night for ghosts, goblins, candy and mischief, or at least it was when we were kids. The world was a different place back then, drugs weren't on every street corner, gangs didn't take up residence in the suburbs, and there were no national threat color coded warnings. I get that, but I went trick or treating the other day with my son. Yeah I know today is Halloween and you would think that tonight would be deemed beggars night, and you might even think that it would start at dusk. That was not the case in our community.
 
We trick or treated in broad daylight starting at 5:30 and it ended at 7:30. It was not on Halloween so only about 1/4 of the houses were even prepared for the horde of dressed up kids. I think it is silly not to trick or treat in the dark on Halloween.
 
The one nice thing that our community did was have cadets from the police academy on foot patrol. It looked like a scene from the hit 80's comedy Police Academy: Citizens on Patrol. All that they were missing was Tackleberry and Tubs. This was a nice gesture by the city, but I can think back to the days of my youth. When Halloween was really something.
 
Bobbi Jo and I would meet up at dark at our Nunny's house. Dress up in the sweetest costumes, not some store bought reproductions; I have nothing against the store bought costumes my son was a store bought Obi Wan and it was cute. After we would get our pictures taken we would embark on an epic journey that would span the entire neighborhood. We grew up in a small little town but we probably walked 3 miles in the course of an evening. Everybody had their porch lights on, dressed up to give out candy, or left a bowl of candy out on their porch for the kids. The weirdest thing from this by gone era was that we knew everybody in our community, by name.
 
This was a different world. Places could call Halloween parties just that, instead of coming up with dumb code names such as harvest parties to cover up the pagan roots of the holiday. We were not afraid of our neighbors, because we knew them, and we didn't live in a housing development, we lived in a community. It is for the kids, so have fun be mischievous leave the toilet paper at home and give out handfuls of candy.

Barry

10.29.2011

Silent Saturday- A busy October

I thought I would share in pictures why I've been missing.  I hope you all are well, and you have a Spooktacular Weekend!  Love you all!  BJ


10.26.2011

Halloween Mantels

 Over the years, I've always had a mantel, but have never really decorated it.  I found a few Halloween mantels on the Internet, and was inspired to do a little decorating of my own.   Here a just a couple

 Pretty simple, but soooo adorable!  Since this is my first year, I thought I would start small and add a little bit each year.  Plus I can go get  a few things when Halloween is over on clearance.

Here is mine
A couple vintage lights of my grandmas
My spider web bowl
Family of Pumpkins 
Haunted House tea light

Like I said, just a start, I can't wait for next year!!!

Have a Happy Humpday friends!!!
BJ

10.25.2011

2 Halloween Treats

I found these 2 adorable finger foods that I will be making for my son's halloween party Friday.  They are too cute not to share with you all.  I love this website, they always have such cute and simple ideas! What will you be making?

Cheese-Finger Food

What you'll need
  • Mozzarella string cheese
  • Green bell pepper
  • Cream cheese
Instructions
  1. Wearing plastic gloves or sandwich bags over your hands to keep the cheese as smudge-free as possible, use a paring knife (parents only) to cut each string in half and then carve a shallow area for a fingernail just below the rounded end of each half.
  2. Mark the joint right below the nail as well as the knuckle joint by carving out tiny horizontal wedges of cheese, as pictured.
  3. For the fingernails, slice a green bell pepper into 3/8-inch-wide strips. Set the strips skin side down on your work surface and trim the pulp so that it's about half as thick. Then cut the strips into ragged-topped nail shapes and stick them in place at the ends of the fingers with dabs of cream cheese.


Forked Eyeballs


What you'll need
  • 2 (11-ounce) bags white chocolate chips
  • 12 doughnut holes
  • Semisweet chocolate chips
  • Tube of red decorator frosting
  • 2 tablespoons vegetable oil
Instructions
  1. To coat a dozen doughnut holes, melt the white chocolate chips with the oil over low heat (and keep the chocolate warm while you work). With a fork, spear each doughnut hole and submerge it in the melted chocolate to coat it, then gently tap off any excess.
  2. Stick a semisweet chocolate chip with its point cut off onto each doughnut hole, cut end first. Place the forks (handle side down) in a mug and allow the chocolate coating to harden.
  3. Use a tube of red decorator frosting to add squiggly veins radiating out from the pupils. 

10.24.2011

Last Minute Halloween Sign Craft

Halloween is almost upon us and hopefully all of your decorations are out.  If not and you're looking for a quick, last minute idea, here is one for you.
Its a sign you can design anyway you want.  I will give you the basic layout plans, you do the rest.

Materials you will need:
2 pieces scrap plywood approx 5" x 18" (size is your choice though)
1 pole/post (I used a 1"x1" post from a deck rail)
4 screws
Paint

Start out by cutting the plywood to any size you want.  This is the sign portion.


Next, use two screws per board and attach to post.


You can put the boards straight or on an angle.  I decided on angling
them for the "spooky" look.


Use a flat black or whatever you have laying around and paint
everything black.


Finally, write something scary on the front.  Since we have three
little monsters, this fit perfectly.


Now we have a sign we can use year after year that will last.  Remember be creative and have fun with your own creation.

Steve

10.20.2011

2 Halloween Drinks

I found these 2 drinks for the kiddos, and thought they were to cute not to share!

Rotten Apple Punch
Ingredients
  • *Apple cider (adjust the amount for the number of people you plan to serve; we suggest at least 1 gallon)
  • * Five 1/2-cup containers (we used * Pyrex glass dishes; other small containers or cups will also work)
  • * Red and green food coloring
  • * 10 to 15 gummy worms
  • * Punch bowl
Instructions
  1. Pour apple cider into all 5 small dishes, stopping about 1/2 inch from the top. Add 2 drops of red and 1 drop of green food coloring to each dish and stir until the colors have blended.
  2. Hang 2 or 3 gummy worms around the edge of each dish and place the dishes in the freezer. If you use more than 3 worms, the rotten apples won't float as well. Freeze until the rotten apples are solid.
  3. Just before serving, slip the frozen wormy apples out of the dishes by setting them briefly in a few inches of warm water in your sink.
  4. Float the rotten apples in a large punch bowl filled with untinted cider. For added creepiness, drape the gummy worms over the edges of your serving bowl.
Tips:
Do steps 1 and 2 the day before serving the punch.
                                    Swamp Juice


Ingredients
  • FOR 8 SERVINGS:
  • 1/2 cup small tapioca pearls (found in the baking aisle of most grocery stores)
  • Food coloring
  • 4 tablespoons sugar
  • 8 gummy fish
  • Seltzer water
  • Lemonade
  • 8 gummy worms
Instructions
  1. MAKE THE EGGS: Bring 6 cups of water to a boil and add the tapioca pearls. Reduce the heat slightly and boil the pearls, stirring occasionally, for 20 to 25 minutes.
  2. COLOR THE EGGS: Divide the pearls, with the remaining water, between two bowls. Add 4 drops of food coloring (we used 3 drops of yellow and 1 drop of green in one bowl, and 4 drops of blue in the other) and 2 tablespoons of sugar to each bowl. Stir the mixtures, then allow them to sit uncovered for 20 to 25 minutes. Drain and rinse the pearls with cold water.
  3. ASSEMBLE THE DRINK: Spoon 2 tablespoons of pearls into each glass and drop in a gummy fish. Fill the glasses with seltzer water, then add a splash of lemonade. Place a gummy worm around a spoon as shown.

via

10.19.2011

Bathroom Kids Art

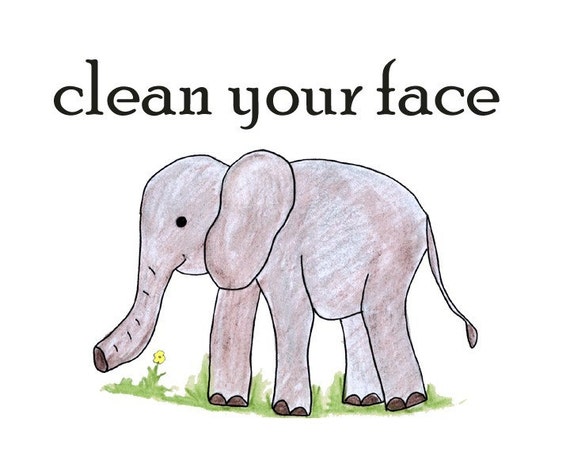
I thought it would be nice to spread the love for Art while Bobbi is enjoying her new bundle of joy! This elephant piece is just too cute and so perfect for your little ones bathroom walls. Clean Your Face!!!!

10.18.2011

Halloween Treats

I found all kinds of cool treats to make for your Halloween party or just for the fun of it.

Of course there is Barry's creation that he shared yesterday.  Zombie Brains


Check out this Chocolate Pumpkin Cake, it looks sooooo yummy!  I found it here

How about some Frankenstein Smores Pops?  Cute, right?!  You can find them here

Gotta Love Martha Stewart, and all of her great ideas, check them out! There are tons of really cute and yummy recipes!

I'm going to try out some of the cute recipes over at familyfun.  I love this website, it always has really cute and fun ideas.

If you have anymore great Halloween ideas/treats, leave them in a comment for myself and others to check out!  Have a Tasty Tuesday all!  You can also head over to Tasty Tuesday at FTLOB

Love, BJ

10.17.2011

Spooky Treats: Zombie Brains


Spookie Treats: Zombie Brains
 
The new season of The Walking Dead premiered last night I thought I would cook up some undead treats for my followers. These grusome snacks are sure to please your little ghouls, and the best part is that they can help.
 
What you will need.
Hot Dogs
Dry Pasta
Large kettle


Take your hot dogs and cut off the rounded ends, then cut them into 1 inch pieces. Each one in piece needs 10 pieces of dry pasta sticking out of it. Follow the cooking directions on the box of pasta to cook these pieces, and viola! Zombie Brains!


Add your favorite pasta sauce for a creepy blood sauce and enjoy. Have a Happy Halloween everybody.

Barry

10.14.2011

Knitting Baby Blankets

My daughter just learned how to knit which is perfect since I have no patience for it. I'm so interested in learning but need a hands on experience. I don't get written directions well, I guess! but I came across this lovely site that gives you some step by step directions for knitting some baby blankets. Check it out here! and if you can spare your experience, please do. ♥Vic

10.13.2011

Featured Post- Tri-ing to be Athletic

Greetings *Cutelings!

*Ok, I'm guessing that's not what DAT's so Cute followers are called, but "Claymates" was already taken.  So, please allow me to introduce myself.  I joined the blogoverse (totally a word, right?), in December.  As we all need to take on a superhero identity online, I chose the nom de plume of TriGirl and write over at Tri-ing to be Athletic.


I decided to stick with the French theme there.  Did you guys see that?

I started this site because I've never been what you might call athletic coordinated. I fell on my head when I was 2 (true story, but I digress).  I've been chronicling my often less-than-brilliant attempts to coordinate my little self into doing triathlons.  Why, you ask?  Because I am a sucker for peer pressure and a bunch of people at work were doing it.

My training includes running,


and biking,


and swimming.


(I'm what's known as a back-of-the-packer).

Sometimes I branch out and take a spin class,


go skiing,


or try Pilates.


I also write about my races in all their glory.  Some good,


some, well, not so much.


I have such a great time drawing, blogging and meeting other crazy like-minded people!  And, no matter what, just when I think I don't have anything more to blog about, I go work out and the story writes itself.  Like magic...disturbing, pathetic, graceless magic.

A big THANKS  to Bobbi/BJ for the opportunity to hijack "DAT's so Cute" for a day!


Tri-ing to be Athletic

10.12.2011

Birthday Wishes- Baby Diesel

I want to wish my sweet Baby Diesel a very Happy Birthday.  It has been an amazing 2 years.  I could never imagine life without this little guy!  He is so much more different than his brothers.  I love you very much and wish many more years of health and happiness!  Mommy loves you!

10.11.2011

Featured Post- Truly Lovely

Hello lovelies!!! 


I'm Kassi and I blog over at Truly Lovely!!


On my wedding day in July!
I am THRILLED to be here while Miss BJ is taking a break and enjoying her new little man!!!

Truly Lovely is a blog about all things my sister and I consider to be well.... LOVELY.


A lot of those lovely things include crafts... 


Or fun recipes like these Reese's Pieces Cupcakes


My mister and I were supposed to get married June 18th, but because of the Wallow Fire in Arizona we had to postpone it until July 9th. 

You can read about that here, if you'd like. 


Here's a Truly Lovely button in case you're looking to spice up your sidebar in the meantime... ;)


Truly Lovely


My sister Kayli shares her lovelies on the blog from time to time as well. 

She just started college in August and as older sisters will do, I shared my advice on things to know before heading off to college. :)


We love featuring other lovelies on our blog!! 
It's a great way to get ideas and meet new bloggie friends. 
Hope you'll stop by our Fancy This Fridays link up over the weekend where you can showcase your projects from the week! 


Fancy This


Hope you'll pop over and say hello sometime... :) 
Until then...
Have a lovely day friends!!!


10.10.2011

Simple Halloween Pumpkin Craft

Instead of always going out and buying decorations for different holidays, its more fun and satisfying if you make your own.  This halloween is no exception.  This halloween pumpkin craft is simple, fast and looks good on a counter or mantle.  There are minimal steps involved, coupled with a small amount of supplies which are probably lying around your house.  Now lets get the rest of the husbands involved and start cutting some wood!

Here are the materials you will need:
Chop saw
Sander
Drill with 1/2" bit
4"x4" (how ever long you want for different size pumpkins)
1/2" dowel rod for stem (again length will depend on how long you want stems)
Green Wire
Paint (surprisingly I went with a color called pumpkin)
Paint brush

First thing you have to do is decide how long you want your pumpkins.  I did not measure
 anything just eyeballed and cut this extra 4"x4" I had lying around.


I made different lengths that reflected the size of my family which includes my wife, 3 sons and myself.


Next, sand the blocks as much as you want.  I take my time to ensure there will be no 
splinters since the boys like to touch them.


When finished sanding, pick your paint color and have at it.  Since this is a pumpkin
some kind of orange is in order.


When they are finished drying, drill a 1/2" hole in the top.


Cut the dowel rod to the length of your choice and place in the 1/2" hole.


With a hammer, tap the dowel rod into place.  No glue is needed as this 
provides a very snug fit.


Wrap green wire around stem and place wherever you wish.


We decorated the mantle and kept with the halloween theme.  They look great next
to the spider bowl.  You can find out how to make the spider bowl here.

Well I hope this inspired you to make your own halloween pumpkins to match your family!! Have a great time decorating and making your pumpkins.

Steve 
Tip Junkie handmade projects